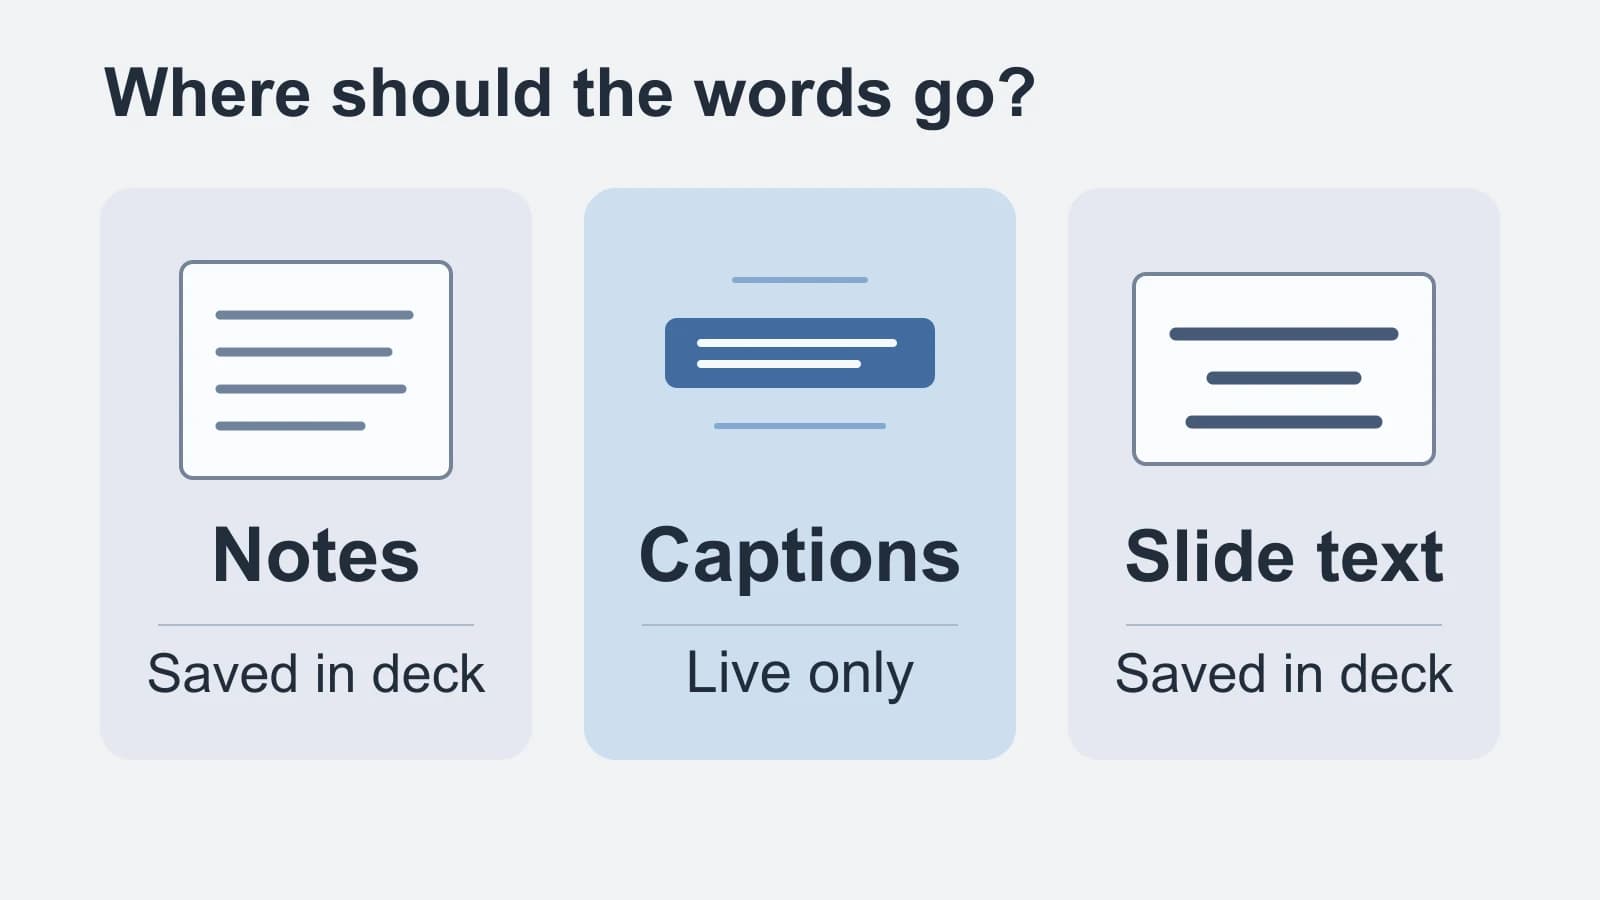
Google Slides speech-to-text destinations serve three different needs. Use Tools > Dictate speaker notes for your talking points. Turn on captions while presenting for live audience text. For words that belong on the slide, prepare the wording and enter or paste it into a text box.
The distinction matters when you expect a written record. Notes and authored slide text remain in the deck. Google says presentation captions are not stored.
We publish this guide and sell the Mac dictation app in the optional section below. We are not affiliated with Google.
Last checked: October 8, 2026. These instructions follow current first-party documentation. The hero is an original diagram, not a Google Slides screenshot.
Choose the destination before turning on the microphone
| Your goal | Control, destination and persistence |
|---|---|
| Talking points for the presenter | Tools > Dictate speaker notes. Words go into the notes below the selected slide. Notes are deck content; when presenting, they appear in a separate window. |
| Live words for the audience | Present > More options > Captions preferences > Toggle captions. Words appear along the bottom of the presentation screen. Captions are transient and are not stored. |
| Words that belong on the slide | Insert > Text box, then enter or paste the prepared wording into the intended box. This becomes authored slide content, rather than live captions or presenter notes. |
The destinations come from Google's speaker-note dictation instructions, caption guide and Slides text and notes guide. For notes and authored text, Google saves changes as you type while online. Offline document saving requires separate setup; it does not establish offline speech recognition.
Dictate your presenter notes
Use this route when you want reminders for what to say about a particular slide.
- Open the presentation in a supported browser and select the slide whose notes you want to write.
- Choose Tools > Dictate speaker notes. The notes area and a microphone box open.
- Click the microphone, speak your talking points, then click the microphone again to stop.
Review the text below that slide. These words belong to the notes, so a spoken paragraph does not become a paragraph on the slide.
Google's voice-typing documentation supports the latest Chrome, Edge and Safari versions. If the option is unavailable at work or school, an administrator may have disabled it. If the microphone box opens but no words appear, check the enabled input in your computer and browser settings.
Voice commands are unavailable in Slides speaker notes. Do not expect the spoken selection and formatting commands described for Google Docs to edit these notes. Punctuation availability also varies by language. The Google Docs dictation guide covers that separate document-writing workflow.
Google states that the browser controls the speech-to-text service and its processing before sending text to Slides. Browser-based dictation is a separate processing choice from simply saving a deck.
Show captions while you present
Choose captions when the audience needs to read what you are saying as you speak.
- Connect to the internet and use an enabled computer microphone or a paired external microphone.
- Open the presentation and start Present.
- At the bottom left of the presentation screen, choose More options > Captions preferences > Toggle captions.
Google also documents Command + Shift + C on Mac. To stop, click CC or use the shortcut again. The caption guide places the words at the bottom of the screen and notes that they have no punctuation.
If you share the presentation screen in a video call, these are Slides captions shown on that screen, separate from the call software's captioning. They caption the speaker's voice. Captions and the microphone turn off after 30 minutes without computer activity, so check their state when returning from a break.
If you need words kept in the deck, choose notes or authored text. For captions across Mac audio sources instead of a Slides presentation, see the Mac Live Captions guide.
Put words on the slide itself
The speaker-note dictation control targets notes. To author visible slide text, select the intended slide and use Insert > Text box if you need a new box. Enter the wording in that box, or paste text you prepared elsewhere. Google's text-box instructions also cover moving, resizing and changing how the text fits.
Keep the audience's wording separate from your speaking cue. A reminder to explain a point can stay in notes; the slide can carry the short statement the audience needs to see.
Illustrative planning example: You intend to say, “The pilot starts Tuesday; ask the team to review it before Friday.” Keep that full reminder in the speaker notes. If you speak it with captions enabled, it can appear as live audience text, with recognition-dependent wording and no punctuation. For the slide, you might instead author two short lines: “Pilot starts Tuesday” and “Review by Friday.” These are synthetic wording choices, not results from a dictation test.
After placing the text, open the presentation view and inspect the actual slide. Check that the audience sees the intended short wording, while the longer speaking cue remains in the notes. Adjust the box or line breaks if the text does not fit.
When Paraspeech fits
For authored slide text on a Mac, Paraspeech can supply new dictated wording for a manual handoff. Review the transcription, use Copy from menu-bar history when history is enabled, then paste the chosen words into the intended Slides text box. This route gives you control over which words become slide content; it does not require a promised Slides integration or automatic insertion result. The current app documentation describes recording and Copy from history. Privacy Mode clears dictation history and stops saving new entries.
The Mac app requires macOS 14 or later, microphone and Accessibility access, and an eligible plan, trial or license. Supported local speech models require Apple Silicon and a compatible model downloaded in advance. Intel Macs use eligible cloud-backed subscription models.
Choose speech processing and AI rewriting separately. Transcription Only skips AI rewriting; Cloud Cleanup sends text online. Account for any eligible online speech fallback as well. Local speech output does not make the destination document service local. Google's native controls above remain the starting point for speaker-note dictation and live presentation captions.